FLOOR TILING
Please read tips and advice on the tiling page for tips on tools required, setting out, using a guide rod, cutting tiles and using tile spacers.
DIY tip :- To achieve a better finished ‘look’ to your tiled floor, skirting boards can be removed and replaced after the floor has been tiled to give a cleaner looking edge.
Just like a wall that is going to be tiled, the floor needs to be clean, solid, flat and free from any loose debris, dust or holes before you start to lay tiles on it. Start tiling from the centre of the room, so measure and mark the centre of each wall and ping a chalk line across the floor from each wall to the opposing wall. Where the chalk lines cross is the centre of your room and the starting point for your first floor tile. See diagram below :-
Before you apply any adhesive, lay a row or two of tiles along the chalk lines to check, from the ascetics point of view, ‘that they look alright’, because even though you have set out from the centre of the room, the room shape itself along with your view from where you enter the room can make the tiles appear to be ‘out’. If this is the case you will have to adjust the chalk lines until the tiles ‘look right’. It does take a little time to do this, but it is nothing compared to how long you will probably be looking, disapprovingly at the tiles for, if they are stuck down without checking.
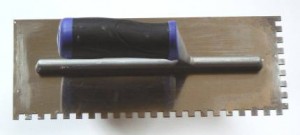
There are wider tile spacers available to purchase in most DIY and tile stores, usually with a width of 6 - 8mm, I usually use a waterproof ready mixed adhesive to stick the tiles to the floor, this comes in tubs in various colours. Apply the adhesive to the floor or floor tile depending on how quickly you can tile (see tiling a wall), using an adhesive trowel as shown below (adhesive spreaders are usually too small for floor tiles), place the tiles in position along the chalk line with a spacer at each corner of the tile, when you have stuck several tiles to the floor, place a spirit level on top of the tile surface to check they are level with each other and adjust as required.

Continue tiling the floor until all the tiles are in position, you may need to tile the floor over a couple of days if access to the room is required so the tiles aren’t dislodged before the adhesive sets. Now you are ready to grout the tile joints (see grouting tiles section).
