REPLACING A 13 AMP SOCKET OUTLET
Tools required :- Electricians test lamps, medium straight screwdriver, side cutters (snips), wire strippers, pliers and a sharp knife.
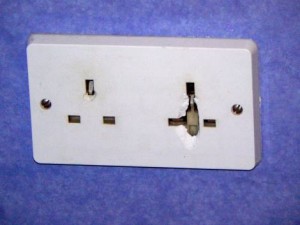
Replacing a damaged or faulty socket outlet should be a fairly straightforward task, but if you aren’t completely confident in your ability then you should use the services of a qualified electrician. You must switch off the consumer unit and remove the appropriate circuit fuse / miniature circuit breaker, this reduces the risk of electrocution should the consumer unit be switched on again by accident. Check that there is no voltage present at the socket using preferably electricians test lamps, socket tester or a test meter, these are available from most DIY stores or electrical wholesalers at a reasonable cost, (always handy to have around the home if only to check fuses etc).
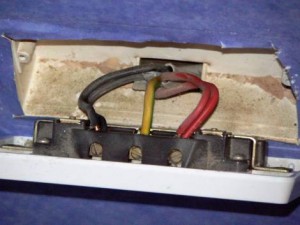
Unscrew the two 3.5mm fixing screws that hold the socket in place, if the socket won’t come free you may have to score around its edges with a sharp knife to cut through any paint or wallpaper and it should come loose, take note of the connections on the back of the socket and the colours of the conductors, you will find connected either : -
OLD COLOURS
RED, ( LIVE ) TO THE ‘L’ CONNECTION.
BLACK, ( NEUTRAL ) TO THE ‘N’ CONNECTION.
GREEN / YELLOW, ( EARTH ) TO THE ‘E’ CONNECTION.
OR : -
NEW COLOURS
BROWN, ( LIVE ) TO THE ‘L’ CONNECTION.
BLUE, ( NEUTRAL ) TO THE ‘N’ CONNECTION.
GREEN / YELLOW, ( EARTH ) TO THE ‘E’ CONNECTION.
If the socket has a metal back box then this should also have a G / Y EARTH wire connected to it.
Disconnect the conductors from the damaged / faulty socket and reconnect to the replacement one, take care that you have connected the right conductor in the correct L, N, or E connection as not all sockets necessarily have the same connection in the same position, ( i.e. the L connection on the new socket could be where the N connection was on the old one ). When you are satisfied the connections are correct and tight, re-fix the socket using the two new 3.5mm screws that come with the new socket, if they are not long enough use the old ones.
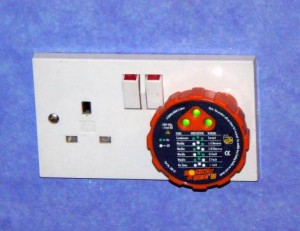
Replace the circuit fuse / miniature circuit breaker in the consumer unit and switch it on, check the socket is working correctly. There are various socket testers available on the market, although they don’t give you test results like you would get from an electrician, they do indicate that the socket being tested is connected correctly and has an earth present, which is obviously very important, you simply plug it in and indicator lights on the front will tell you if everything is ok.


