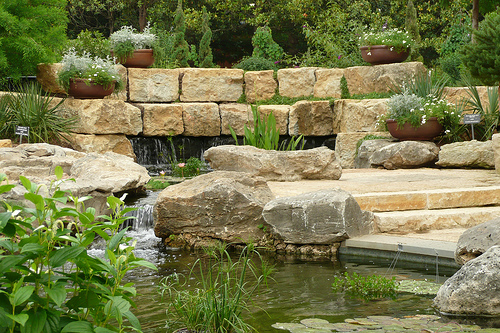
CREATE A DIY GARDEN POND
Garden ponds are an excellent feature to have in any garden, a pond combined with a water feature, such as a small fountain enhances your garden, they help to create a relaxing atmosphere where you can just sit and chill out, listening to the sound of running or trickling water in the background. The pond can become the main feature of your garden, you just need to decide where to site it, as there are a few things to take into consideration before you start work.
How big and what shape do you want your pond.
Do you want to use a pond liner to create your own pond shape, or are you going to purchase a preformed fibreglass pond.
Do you want the pond to be sited in a sunny position (sunshine apparently encourages algae growth).
Is your favourite site for the pond beneath any over hanging trees, as you will be constantly removing leaves from the water during the autumn months.
Do you need to consider child safety, will you need to build a fence around the perimeter of the pond and reduce the depth of your design to reduce any risks to young children.
Where do you want to site the pond in relation to where you sit out in the summer.
Do you want to add a water feature such as a fountain or waterfall.
What depth do you want the pond, do you want it to have different levels (Black pond liners give the pond a deeper look).
The pond will require an electrical supply for the pump, so check if it is practical to do this with regard to installing the cable from the pond to your property. (see pond electrical supply post)
When you have decided on the pond type (liner or fibreglass), size, shape and where to site it, you can mark out its position on the ground using small sticks and string. Make sure that you have a plentiful supply of rubble/strong bags if you intend to get rid of the dug out soil yourself, you may wish to order a small skip as it is quite surprising, depending on the size of your pond, how much soil you have to excavate. If you want to re-use any turf from the pond location, cut through the turf with a spade using the string line as a guide, remember to cut approximately 8 inches (200mm) out from the string line around the whole circumference, this is to allow for the pond liner overlap (which can be covered later with turf or stone slabs etc, then cut through the turf across the pond in straight lines approximately a spades width apart, now remove the turf by cutting through the soil just below the turf surface.
Excavate the soil to either the required shape and depth for the fibreglass pond, or to suit your own design for the pond liner, remove an extra 1 inch (25mm) of soil from your excavation and remove any sharp stones etc. Check your excavation is level using a spirit level, if not add or remove more soil as required. Now lay a soft base of damp building sand and pond felt or even old carpet, at least 1 inch (25mm) deep all around your excavation, this protects the pond shell or liner from any sharp stones, etc, that may puncture the pond base or liner.
Now place the fibreglass pond in the hole and fill any gaps around the sides with soft soil and sand and fill it with water to around 1 inch (25mm) below the top edge, if you have a pond liner, drape the liner over the hole, at this stage just get the liner in roughly the right position with an even overlap around the edges taking care not to punture it, place bricks or weights on the overlap edges to hold the liner flat and in position (see fig 1 below) then start to fill the liner slowly with water from a hosepipe, as the liner fills, lift the bricks slightly to allow the liner to slide slowly down and bed against the sides and base of your excavation, smooth out any folds in the liner as well as you can and fill it to around 1 inch (25mm) below the top edge of the liner.

Allow several hours for the pond liner to bed into the excavation, then trim off any excess liner around the pond edge, I would leave an overlap of around 7 inches (180 mm) which can be covered with either turf or stone slab, etc. The pond can be lined with carefully placed smooth large pebbles (take care not to puncture the pond base or liner) which creates a rock pool effect, like the one in the video below which I think looks very effective.


June 18th, 2011 at 10:06 pm
Very good article very informative and easy to follow tips I would defenitly recomend reading it to anyone building there first garden pond or water feature