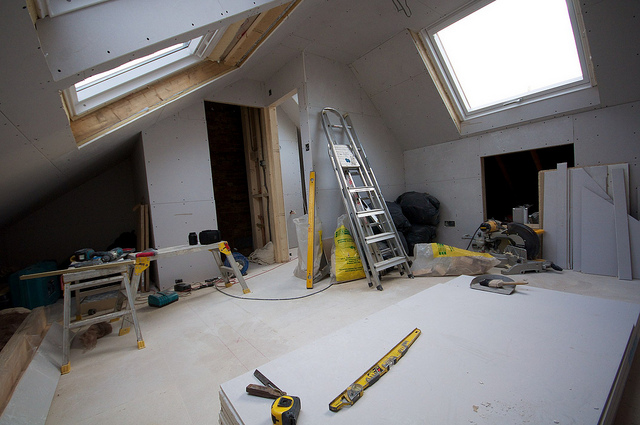
As DIY projects go, converting your own loft or attic space is probably one of the most complex due to the amount of hard work you’ll need to put in, and the amount of time you’ll need to spend on the task.
Ultimately though, this is an incredibly rewarding endeavor that could well add significant value to the resale price of your home.
Also, it will mean you gain an extra room that can be used for any manner of applications. You might decide to turn it into an office, a spare living space, or even a recording studio if that suits.
So, if you’re interested in learning how it’s possible to achieve this, read on…
Don’t forget - before you start on a project like this, you will need to have in place all the relevant permissions and paperwork (watch the video at the end of the post).
Typically, due to relaxed building laws, you don’t need planning permission for a loft conversion, but the work will need approving. The best thing to do is check with your local council.

Step Number One - Fitting Flooring
Presuming you’ve already got strong wooden floor beams in place, all you really need to do is fill the gaps with some insulating material and then lay floorboards on top. Some people cheat a little here and use large square or rectangular wooden boards, but they never provide the solid floor you really need. If you want to seriously decrease the chances of falling through the ceiling, I’m afraid proper floorboards are the way to go.
Step Number Two - Fitting Insulation
The quickest and simplest way to insulate your loft is to use specialist insulation boards. These are much easier to handle than the traditional products and so you should have no trouble sliding them in between the beams. Just make sure they come right up to the lip, as you don’t want any space between the insulation boards and your plasterboards.
Step Number Three - Fitting Plasterboards
Now your insulation boards are in place, it’s time to measure the gaps between your loft beams and cut your plasterboard to the right size. I’d advise you to use an electric saw or a sharp craft knife for this, and to make sure you wear a protective mask and goggles. Once the boards are cut to size, you need to tack them in place using suitably sized nails or screws. Where your loft walls are angled, this can be tricky, and so asking for the help of a friend could be a wise move. Also, ensure you leave a couple of boards off, so you’re able to run wiring from downstairs if needed.
Step Number Four - Plastering
Unless you’re willing to pay for loft conversions by skilled draughtsman, it’s probably sensible for you to employ the services of a professional plasterer at this stage, but the job can be done DIY if you really want to. You’ll need to ensure a thin layer of plaster coats all the boards you’ve fixed in place, paying special attention to the joins and weak spots you may have noticed.
Well my friends, you should now have a basic idea about what converting your own loft will involve. Obviously, those who want to install a window will have a harder job ahead of them, but for people who just want to create a usable space, the task is pretty simple.
Here’s a couple of videos that may help you visualise the process.
Video: Loft conversion with inlcuding one Velux window
Credit - Econoloft
Video: DIY loft conversion
Credit - Daniel Greening
Video: Building regulations and loft conversions
Credit - LABC Building Control
Picture Credit
