Dave's DIY Tips

  • Gear
    • Cordless Power Drills
    • Corded Power Drills
  • DIY TIPS
    • BRICKWORK
    • BUILDING WORK
    • SAFETY TIPS
    • ENERGY SAVING TIPS
    • ELECTRICS
    • FIXINGS FOR DIY
    • ESSENTIAL DIY GUIDES
    • HOME SECURITY
    • HOUSEHOLD MAINTENANCE
    • PLANNING DIY JOBS
    • TOOLS FOR DIY
    • WOODWORK
  • DECORATING
    • PAINTING TIPS
    • TILING TIPS
    • WALLPAPERING TIPS
  • OUTDOORS
    • FENCING AND SHEDS
    • GARDEN DIY
    • GARDEN FEATURES
    • PATIOS AND PAVING
    • SHEDS
    • WINDOWS
  • INTERIORS
    • BATHROOM
    • BEDROOM
    • KITCHEN
    • FLOORING
  • HOW TO FIT A KITCHEN
  • Advertise
You are here: Home / Building Work / Plastering - The Tools you Need to get the Job Done

Plastering - The Tools you Need to get the Job Done

Last Updated: November 4, 2015
Take a look at these cordless vacuum cleaners

If you find yourself involved in a home improvement project such as hanging drywall, painting or wallpapering, having the proper plastering tools are essential. Fortunately, all of these items are available at your local hardware or home improvement store.

Trowel

A trowel is an important plastering tool that allows you to smooth the plaster after applying it to the wall. This tool is used to flatten the plaster down over the area intended for plastering. It’s important to have a good, clean surface on the trowel to provide for a uniform finish.

Plastering Tools - Trowel

Hawk

A hawk is used by the professionals to carry the plaster with them as they move down the wall. An advantage of this, over carrying plaster in a pan or working from the bucket directly, is the amount of drywall compound that that can be picked up by the trowel in each “scooping” action. As plaster sticks to the hawk after a few seconds the hawk can be tipped up at a 90 degree angle whilst scooping plaster off with the trowel.
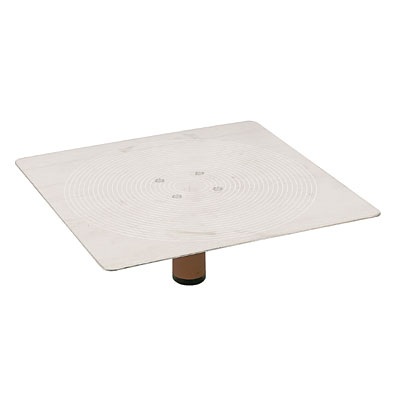
Plastering Tools - Hawk

Mud Pan

A mud pan can be used instead of a hawk for the less experienced plasterer. While it can be more wasteful, time consuming and laborious scooping plaster material out of the pan, it is harder to spill material onto the floor with the pan than with a hawk.

Utility Knife/Scissors

A utility knife or scissors will help cut plaster tape to size. The utility knife is employed to square out the edge of the hole to be plastered over if repairing damaged walls. Straight edged holes are easier to smooth over for an even surface.

Sponge/Sandpaper

A wet sponge is used to smooth out unevenness that may occur after plastering the wall.
Coarse grit sandpaper is used quickly to smooth out large areas of rough unevenness, and then the finer grit is used to finish up the area.

Jointing Knife

A jointing knife is essential for defining a straight line and edging into tight spaces such as corners and those areas that are tight, such as between a window near the wall and the wall that is perpendicular to it. They come in a variety of shapes and sizes as needed. Angled jointing knives help reach hard to reach angles.
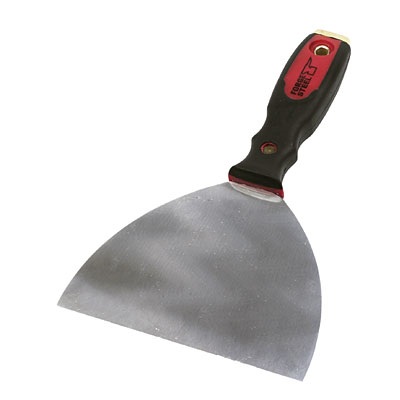
Plastering Tools - Jointing Knife

Step Ladder

A step ladder is an invaluable tool for reaching the holes in the walls at the higher areas. Try to get a ladder which includes a pan shelf at the top. You can carry the materials and tools you are using in the pan to reduce fatigue and time spent going up and down the ladder.
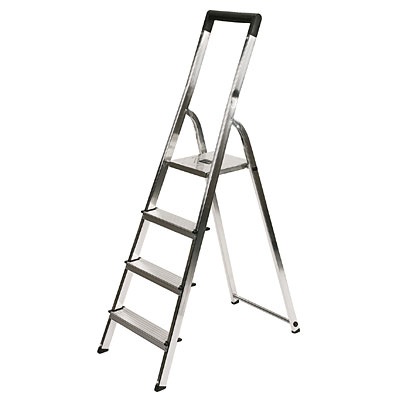
Plastering Tools - Step Ladder

Bucket

Never discount the importance of a couple buckets of clear, fresh water for keeping tools clean and for wetting the sponge during the project.

Check out Amazon for decent deals on plastering tools.

« Plumbing Supplies - What do you Need?
How to Deal with Discoloured Grout »

Comparison Guides

  • Cordless power drills
  • Corded power drills

Recently Popular

  • A Guide to Using Lining Paper to Achieve the Same Finish as a Newly Plastered Wall
  • How to Build a Summer House
  • How to Repair Cracked or Damaged Plaster on Internal Walls
  • Bricklaying Tips and Advice for the DIYer
  • How to Build a Brick Barbecue
  • How to Paint Interior Doors Like a Professional
  • How to Install PVC Gutters and Downpipes

Recent Posts

  • 7 Home Renovation Blogs to Follow for Tips, Ideas and Inspiration
  • How Much Does it Cost to Install a New Bathroom?
  • 10 Smart Tactics To Minimise & Recover From Flood Damage
  • 6 Ways to Easily Prevent Blocked Drains
  • 10 Home Décor Apps You Need To Know About
  • 6 Things to Remember When Building Raised Brick Flower Beds
  • 5 Ways to Make Your House Passivhaus
  • 
  • 
  • 

Collins Complete DIY Manual

collins-diy-manual-300x200A 'must own' manual for anyone learning DIY. Plenty of tips, tricks and ideas to help you go from Bob the Bodger to Bob the Builder. Check it out.

Bathroom DIY Tips

  • How to Fit a Bathroom Extractor Fan
  • The Do’s and Dont’s of Bathroom Design
  • Space-Saving Bathroom Ideas
  • Essential Advice and Tips for Replacing a Bathroom Suite Yourself
  • Simple Ways to Revamp and Improve Your Bathroom

DIY Building Tips

  • A Guide to the Different Types of Plaster
  • How to Mark Hinge Positions on a New Internal Door
  • How to Repair Cracked or Damaged Plaster on Internal Walls
  • How to Fit Door Handles and Latch to Interior Doors
  • Idiot’s Guide to Dry Lining

About | Contact | Privacy Policy | Disclaimer

Website Maintained by WordPress Made Easy

Copyright © 2016

We use cookies to ensure that we give you the best experience on our website. If you continue to use this site we will assume that you are happy with it.OKNo