Financially, using a water butt to collect rainwater from your house, garage or garden building doesn’t make much sense. Tap water is fairly cheap, and it takes a lot of rain to fill the average water butt, meaning it could be a while before you see a positive return of your investment.
On the other hand, if you care about the environment, don’t like the idea of pouring tap water onto your plants or the nearest tap is far away (you may own an allotment or very large garden), using a water butt like this one to store rainwater to feed the plants in your shrubbery, borders or vegetable plot makes a lot of sense.

And the good news is, they’re easy to fit and it won’t take you long to do the job.
Before we get into the procedure, let’s look at the different types of water butt on the market. You’ll want it to look good in your garden and easy to use wherever you store it.
Different types of water butt
Water butts come in a range of sizes and typically start at around £20-£25 for the commonly used plastic type.
Smaller ones hold around 100 litres of rainwater, while the largest I’ve seen around the web holds 510 litres of water. If you want to buy one of the larger ones, expect to pay somewhere between £200 and £300.
Bigger is usually best as they hold more water, but if you don’t have enough space, you may prefer to choose a smaller one.
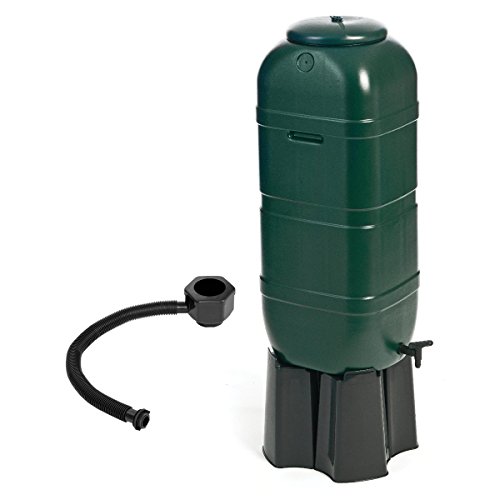
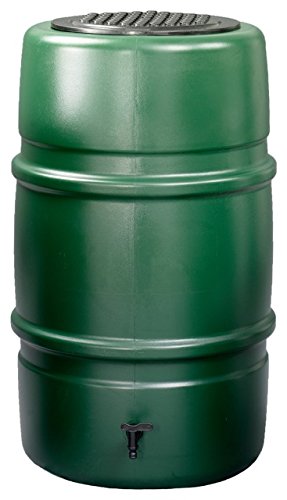
Water butts are usually made from rigid plastic, with green being the most popular colour.
They’re not exactly ugly and they aren’t exactly pretty but if this style isn’t quite right for you, take a look at Water Butts Direct, they offer a wide range of decorative alternatives.
If you prefer a more traditional look and feel, take a look at these oak barrel water butts by for sale on The Barrel Makers website. Prices start at £135 (at the time of writing) for a 40-gallon rustic oak barrel water butt.
If you don’t already have something to stand your water butt on (bricks, step etc), you’ll need a stand, otherwise, the tap will be too close to the floor and you won’t be able to get your bucket or watering can anywhere near it.
(The ‘how to’ instructions below assume you’re using a stand, rather than bricks or a step.)
Plenty of places sell water butt kits. They’re a good choice for anyone installing a water butt for the first time. The kit usually comprises of a water butt, tap, lid and down pipe diverter.
Tools needed to fit a water butt:
- Water butt
- Water butt stand
- Water butt connector kit
- 25mm drill bit
- Utility knife
- Spirit level
- Power drill (we have a handy guide to electric power drills)
- Tape measure
- Pencil
- Saw
Method for fitting a water butt:
- Place your new water butt stand on firm, level ground. It should be no more than 500mm away from the downpipe you’re connecting it to.
- Place your water butt onto the water butt stand.
- Screw the tap into the hole provided at the bottom of the water butt.
- Using your drill, make a 25mm hole at the top of the water butt. This is for the hose.
- Attach the hose connector to the water butt using the washer and nut provided.
- Using a spirit level, mark out the section of the downpipe you want to cut out to accommodate the connector. This should be level with the hose connector on the water butt.
- Before you start cutting, check the manufacturers instructions and follow the recommendations for cutting out a section of the downpipe.
- Cut the diverter lid to the shape of the downpipe and install before connecting the diverter.
- Make sure the diverter is connected to the downpipe at the same height the hose enters the water butt.
- Cut your hose to the correct length, and connect the downpipe to the water butt.
I’m sure you’ll agree, the process for fitting a water butt is really very simple and something the typical DIYer can easily manage in an hour or so.

Check out this water butt on Amazon. There are more to choose from if you don’t like it.
Video courtesy of Woodies DIY.